Here Is An Easy Easter Craft Your Kids Can Do With Stuff You Already Have
It’s Easter and you’re (lovingly) trapped at home with your wild kids running around – how on earth are you supposed to get that gorgeous holiday ham ready AND keep the kids entertained? This is especially hard if you’re in a state that is under a stay-at-home order…you’re stuck coming up with ideas using what you already have on hand…
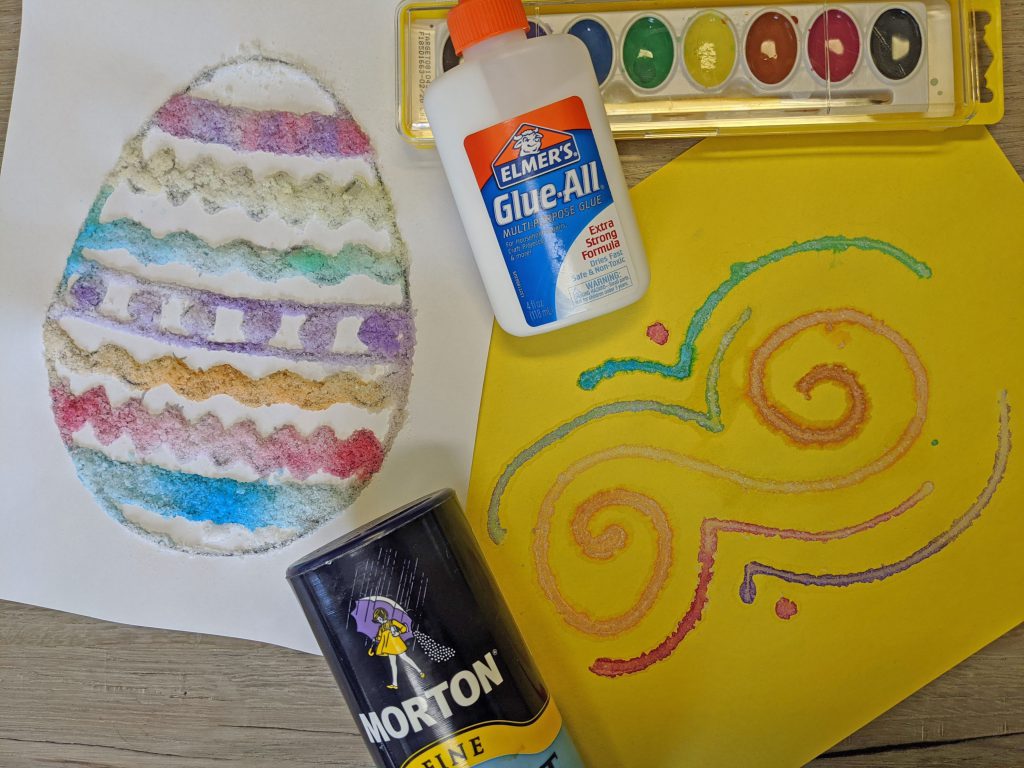
Making crafts doesn’t mean you need to run out to Hobby Lobby every time you want to do something. It can be fun to come up with crafts using stuff you already have at home! This salt watercolor art is the perfect craft to kill some time and save your sanity!
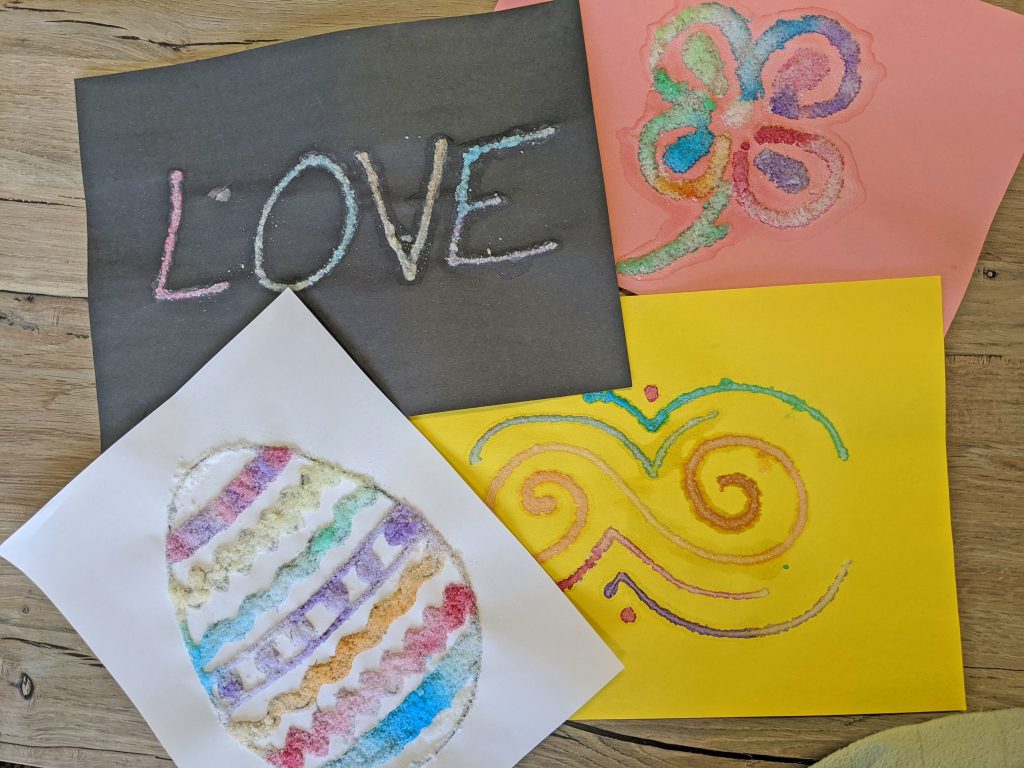
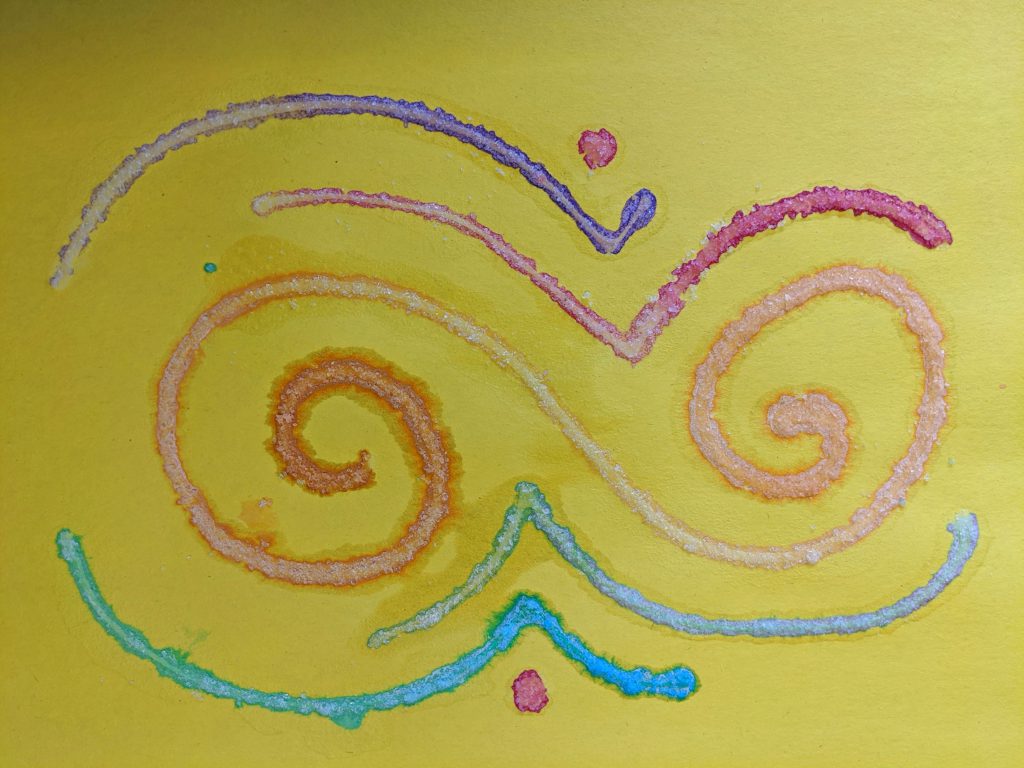
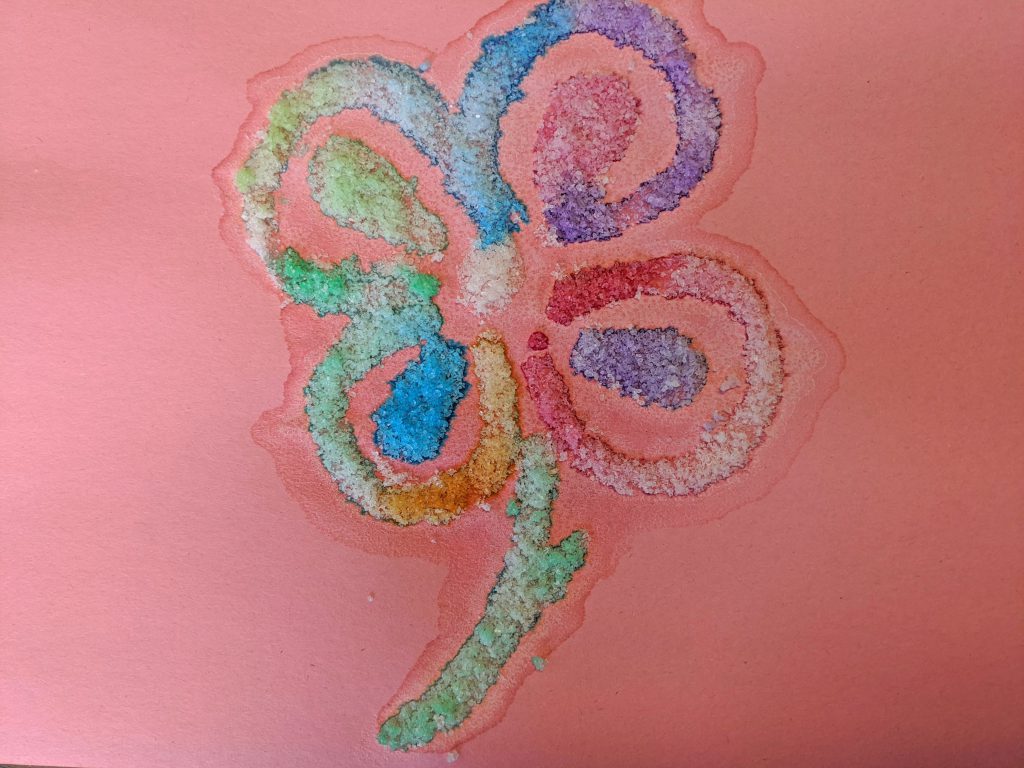
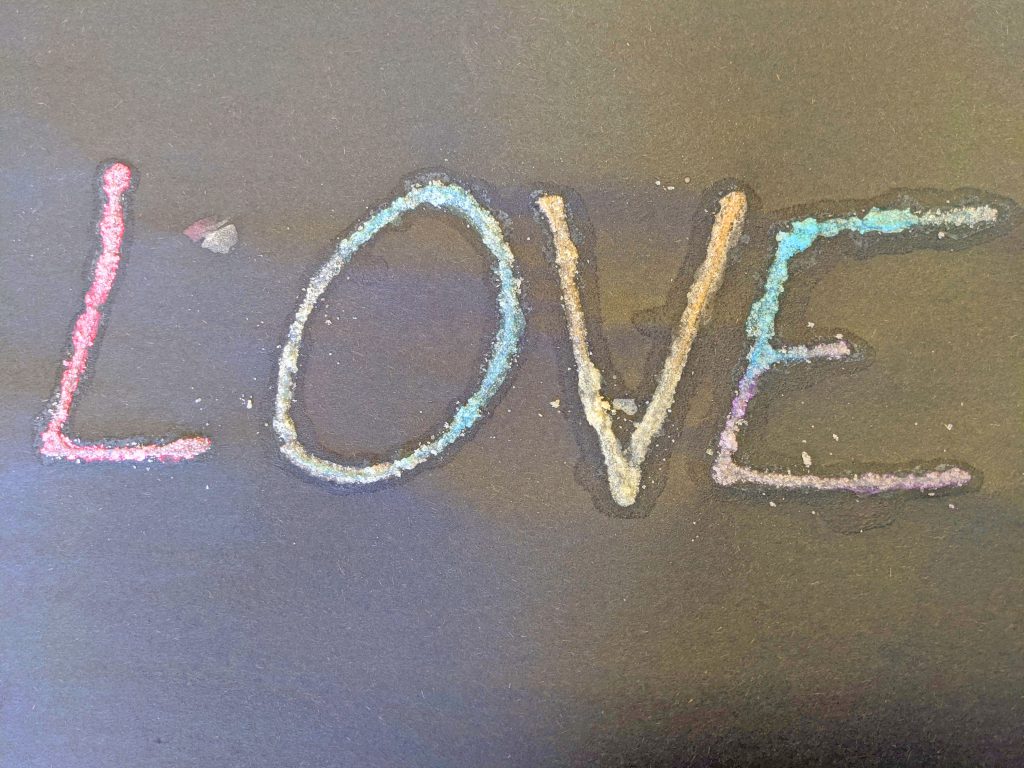
Now, the point of this blog is not to show off my perfectly curated crafts…it’s to offer some realistic crafts and show you how they turned out for me – a total craft novice. To be honest, this is a craft that did not go as well as I had hoped but I think it was in large part to what I tried to make…Most of the salt watercolor pieces that I did involved thin lines of salt on construction paper – both not great choices for this craft. If you decide to give this craft a try I would recommend using cardstock or some other form of sturdy surface. I would also recommend that you use thicker lines – thin lines do not allow the watercolors to “bleed” as well so the effect gets lost.
Below I’ve listed the necessities on the top and then provided some other items that are optional when it comes to decorating your baskets.
| Item | Cost |
| Watercolor paint | $0.99 |
| Glue | $1.29 |
| Salt – you likely already have this on hand | $0.89 |
| Cardstock | $6.99 |
| $10.16 |
And here is your step-by-step guide to making salt watercolor art:
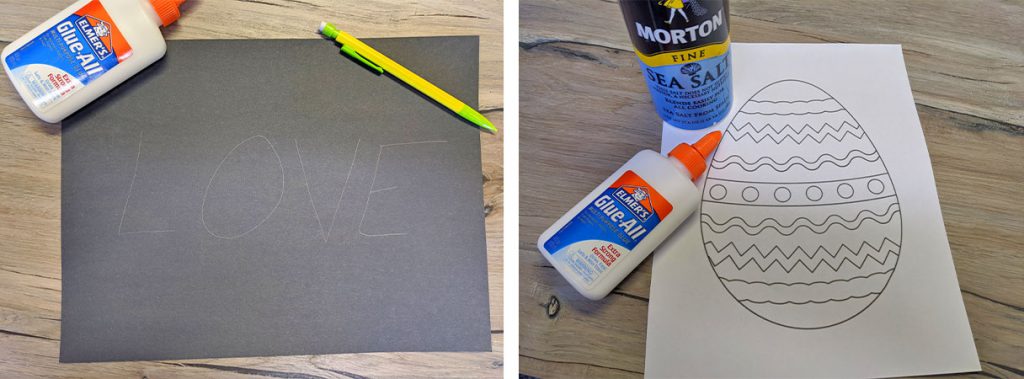
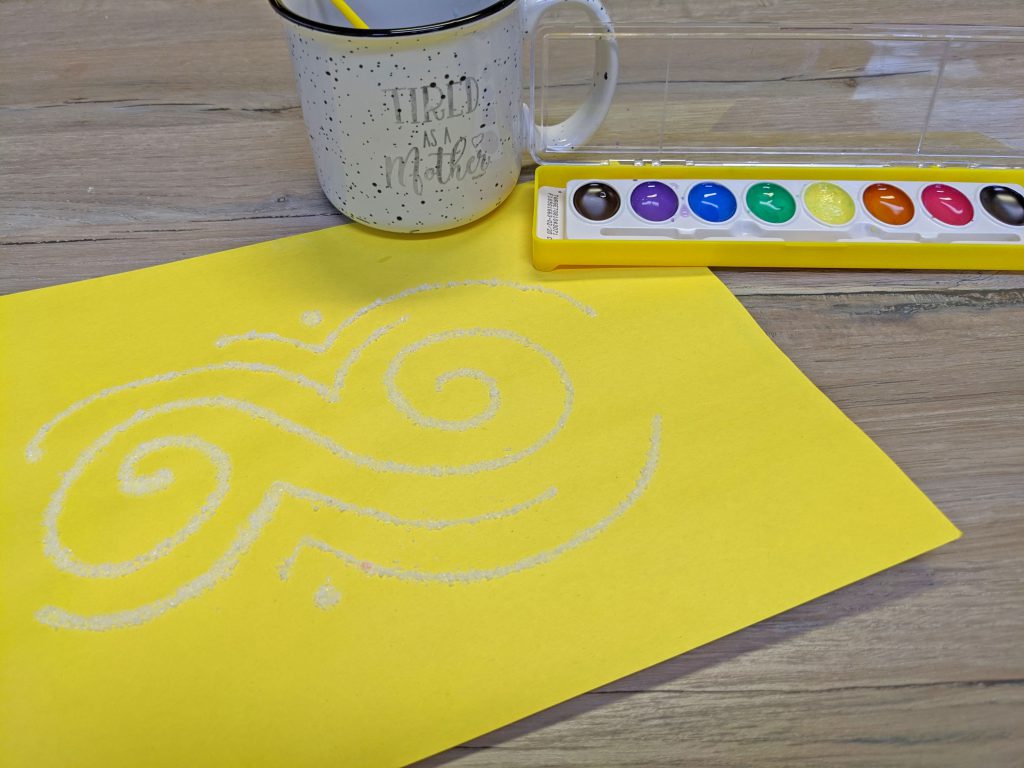
1. Optional: If you or your kids are a picky Polly about their art then I would recommend you print out or use a pencil to trace what you are going to draw first.
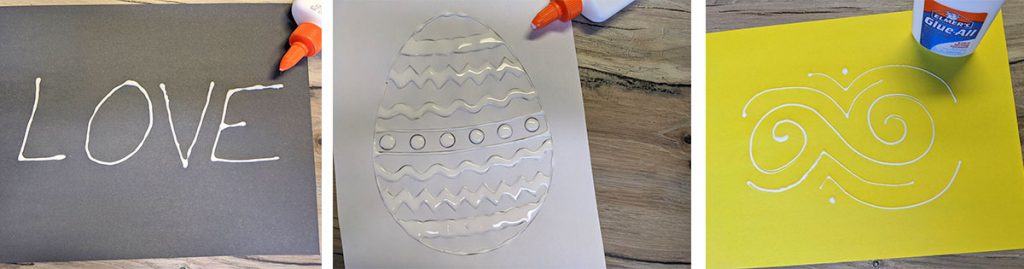
2. Once you know what you are going to draw, take your liquid glue and make it so! As mentioned above, I recommend using thick lines of glue to ensure you get the best watercolor effect.
When deciding what to make your masterpiece on I would recommend you use a sturdy base. This could mean some cardstock, but if you don’t have that lying around cardboard could also do (Lord knows we’ve got a constant supply of that thanks to my Amazon shopping addiction). I used printer paper and construction paper and found that the salt was too heavy for it and then the watercolors made the paper too wet to get a nice looking final product – but if that is all you have at home, it does still work so feel free to go for it!
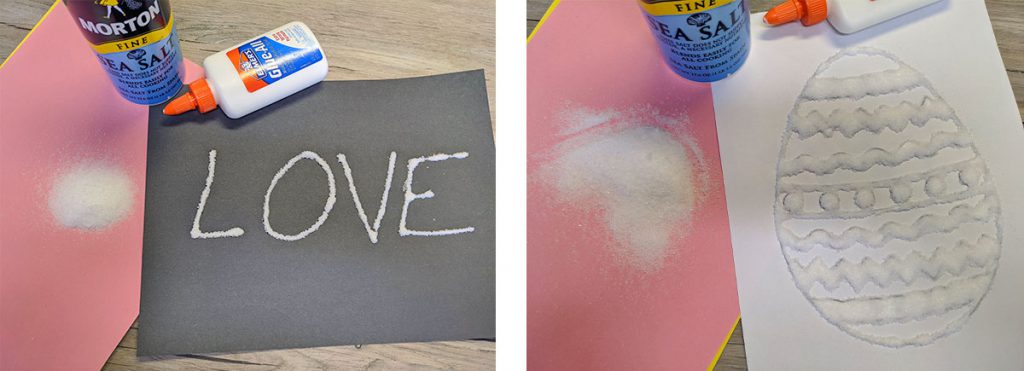
3. Before the glue dries, take your salt and sprinkle it over all your glue.

4. Once you have salt covering all your glue, pick up your piece of art and shake the excess salt off. I recommend shaking the salt off onto a piece of paper so that you can reuse the salt for another piece of art. Once all the excess salt is off set your paper aside and let it dry. This may take a couple hours so it may be good to start this project in the morning and finish up later that day.
5. Once dry you’ll want to shake off any additional excess salt that did not adhere to the glue.
6. Now that your canvas is ready, get your watercolor station set up with a cup of water, your paint, and a paper towel (to dry the brush off between colors).
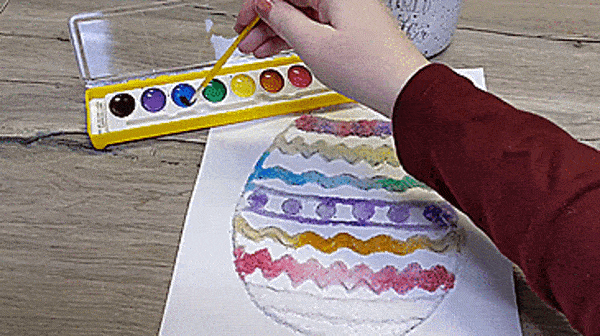
7. Start Painting!
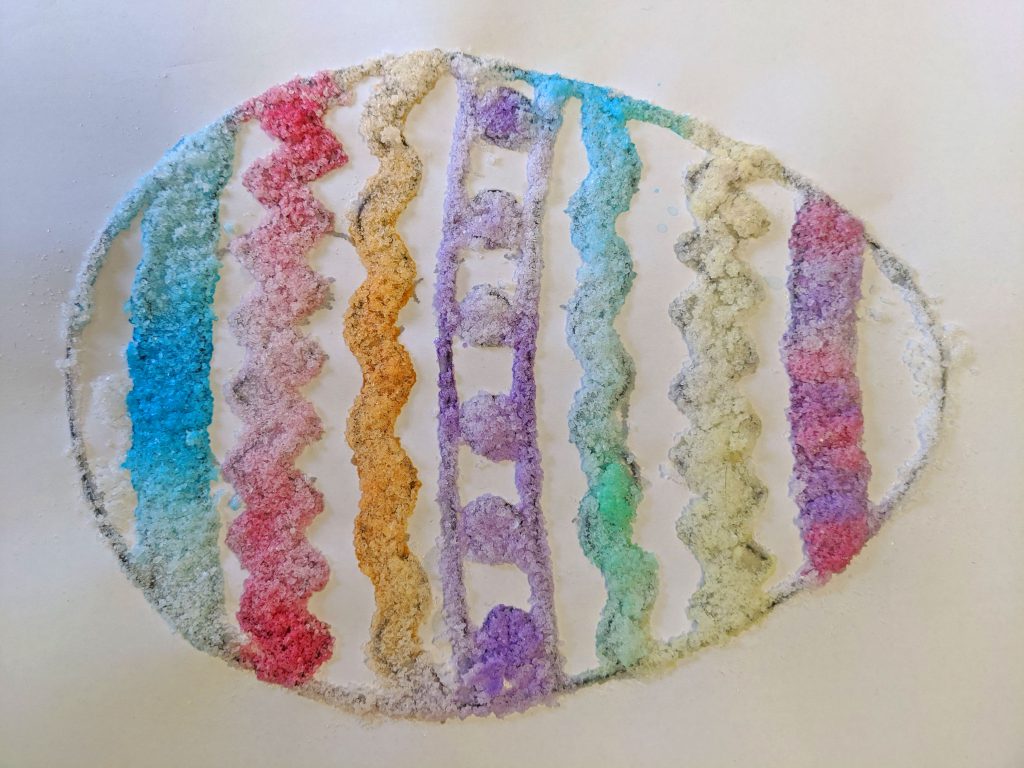
To get a fading effect, start using a heavy amount of color in one spot. Once you get that area the color you want, dip your brush into the water and continue to move along only adding water. The color will bleed from the concentrated part out to wherever you put the water. I think it looks great when you can get one color to fade into another color using this effect.
8. Once you’ve got your picture fully colored, set it aside and let it dry.
If you don’t already, follow unkrafty on Facebook, Pinterest, and Instagram!
This post may contain affiliate links.