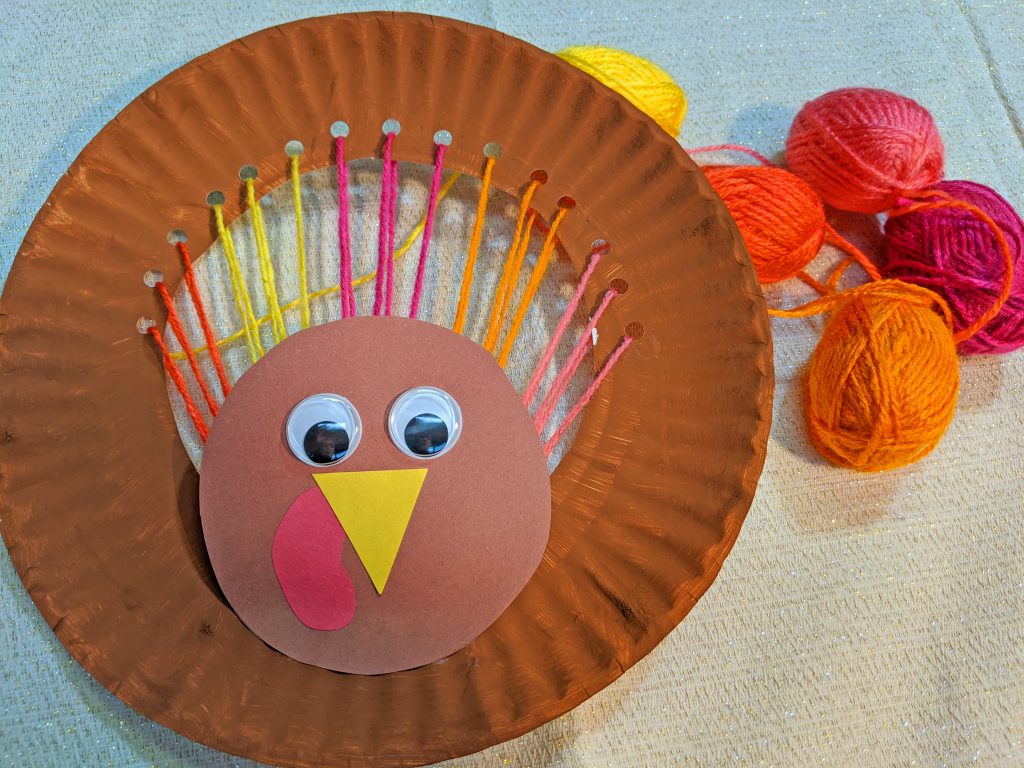
This Paper Plate Turkey Is The Perfect Kids Thanksgiving Craft
As Thanksgiving approaches it often leaves me thinking about all the things I am thankful for – and happy, healthy children is a big on on my list! But when you’re main focus on turkey day is that plucked poultry sitting in your sink how do you keep the kiddos happy…you set up a fun turkey day turkey craft for them to do!
This paper plate turkey is the perfect craft for any kid who has a little patience and it won’t bust your wallet because you likely have many of the items at home already. This is also a great craft to help kids with their fine motor skills at it will require them to thread yarn through punched holes (Yay! I love a two-fer).
The items I used to make this paper plate turkey are listed below, but as I said, you will likely have some or most of these items lying around the house already.
| Item | Cost |
| Foam Brush | $3.69 |
| Crayola Tempera Paint | $7.24 |
| Uncoated Paper Plates | $3.90 |
| Construction Paper | $2.59 |
| Peel and Stick Wiggle Eyes | $5.99 |
| Yarn Variety Pack | $5.29 |
| Hole Punch – The one used in my post is not this exact one, but close | $5.28 |
| Glue Stick – I had a glue stick at home already, but this is a comparable one | $2.18 |
| $36.16 |
So, how do you turn a paper plate into an adorable turkey?
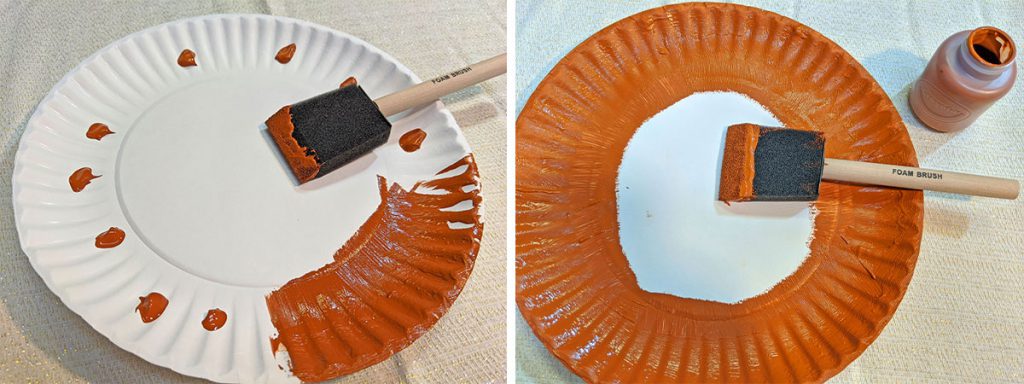
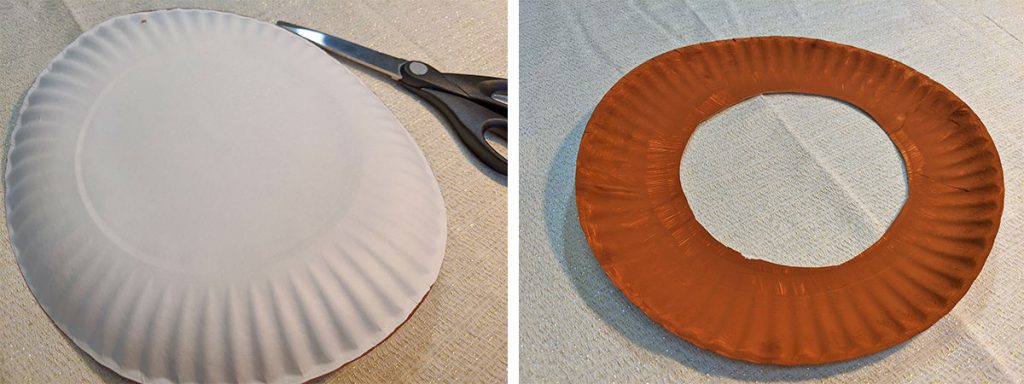
1. Paint the outer ring of your paper plate and set aside to dry. While brown paint is classic, feel free to let your kids create a turkey that is any color they can imagine – that makes it so much more fun! I used a foam sponge brush because I think it’s easier, but a paint brush would work just as well.
NOTE: It is best to use uncoated paper plates as the paint adheres better to these plates than those fancy coated ones. And you can use the leftover plates for pie later in the day!
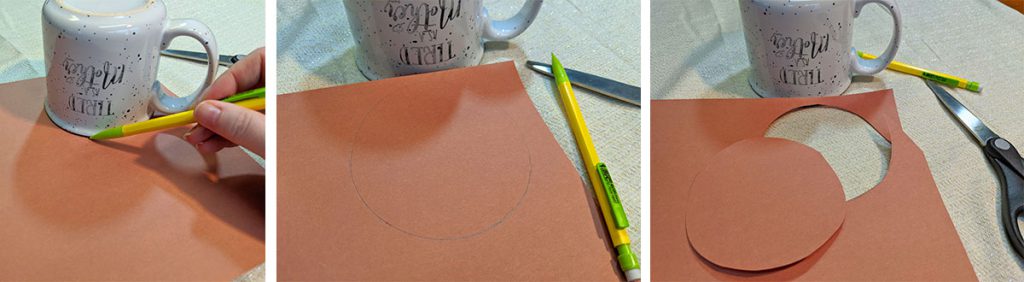
2. While the plate is drying, make your turkey face out of colored construction paper.
a. I used a cup to trace a circle on a brown piece of construction paper and cut that out for the turkey head.
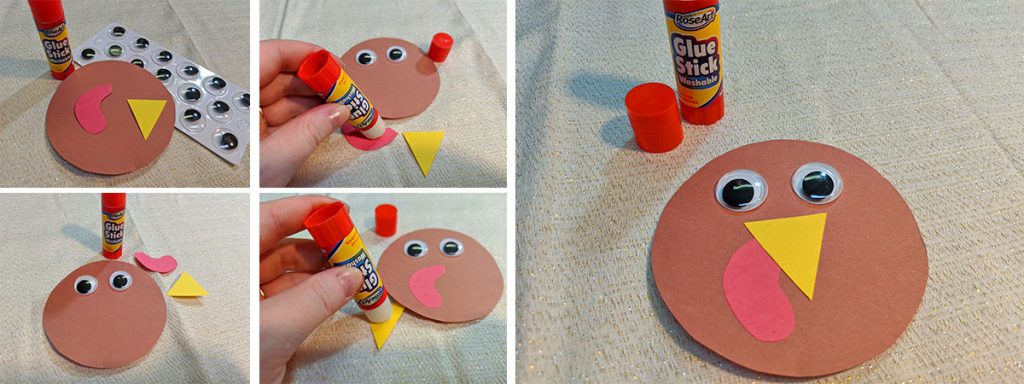
b. Next I cut out a triangle from a yellow piece of construction paper – this is the beak.
c. And last I made the turkey’s snood (yes, that thing that hangs from a turkey’s beak is called a snood) from red construction paper. I wasn’t sure how to describe the shape of this so the best I can articulate is to cut out a large comma looking thing…

3. Assemble your turkey face. To do this you will first stick your googly eyes on the round brown construction paper. Once your eyes are in place, use your glue stick to attach the snood and the beak…and wah-la, you have a turkey face!
4. By this time the paper plate should be done drying. Using a kid-safe scissor, cut out the inner circle. I found it easiest to turn the paper plate upside down (so you’re looking at the unpainted side) and follow the circle that you see on the back.
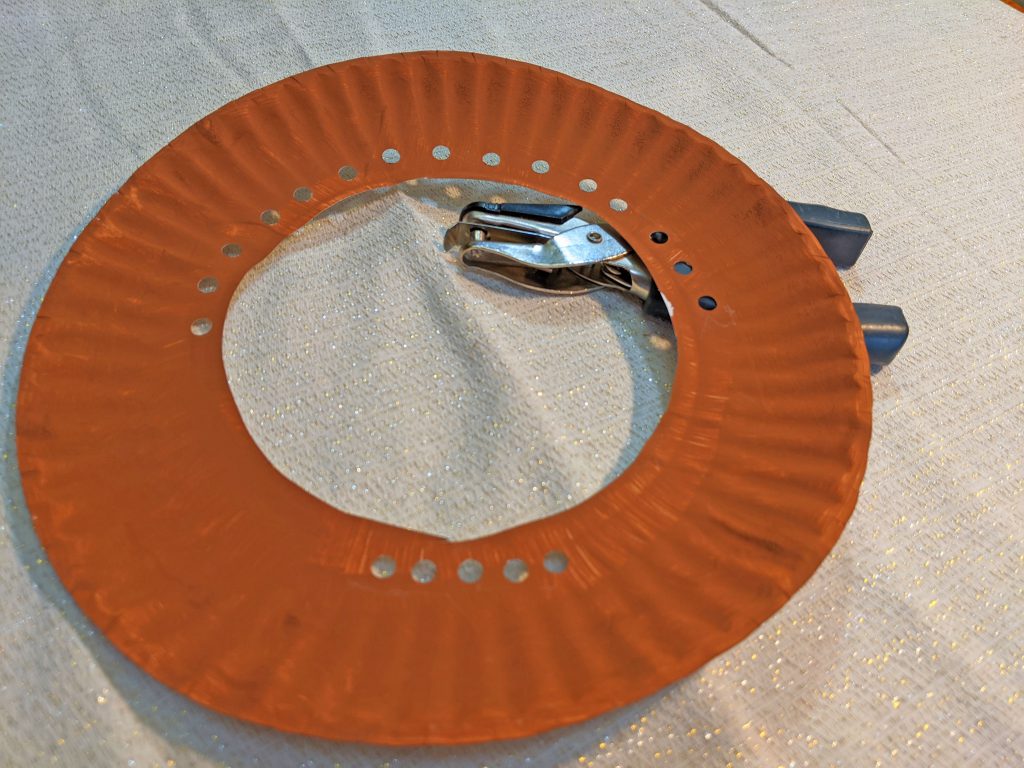
5. Now it’s time to punch your holes! Using a single hole punch, punch five holes fairly close together in a row towards the center of the plate. After these holes are punched you will then punch 15 holes in a row on the other side of the plate. Again, these holes should be towards the center of the plate.
NOTE: For the best results the 15 holes should be fanned out. I started with my two most outer holes about halfway down the side of the plate and then worked my way to the middle keeping the holes evenly spaced out.
6. To thread your yarn one bottom hole will pair with three top holes. You will start by stringing your yarn through the far left bottom hole and then pulling the yarn to go through the far left top hole. You will keep pulling the yarn to go back down and through the far left bottom hole again, and then you will pull the yarn up and through the second from the left top hole. You again will pull the yarn to go through the far left bottom hole, and then back up one more time through the third from the left top hole. Then you will pull the yarn back down one more time and tie a knot on the back of the plate. You will repeat this with the next bottom hole and the next three top holes…and so on until all of the holes have had yarn strung through them.
Be sure not to pull the yarn too tight or it will warp your plate.
NOTE: While I used five different colors of yarn, you could use more or fewer colors…in fact you could use all the same color if you wanted – it’s truly up to your (or your kids) preference and what you have on hand.

7. After all your yarn is strung and tied off you will attach your turkey head to the body. To do this use your glue stick and run some glue right below the bottom hole punches. When you have the desired amount of glue, take your turkey head and attach.
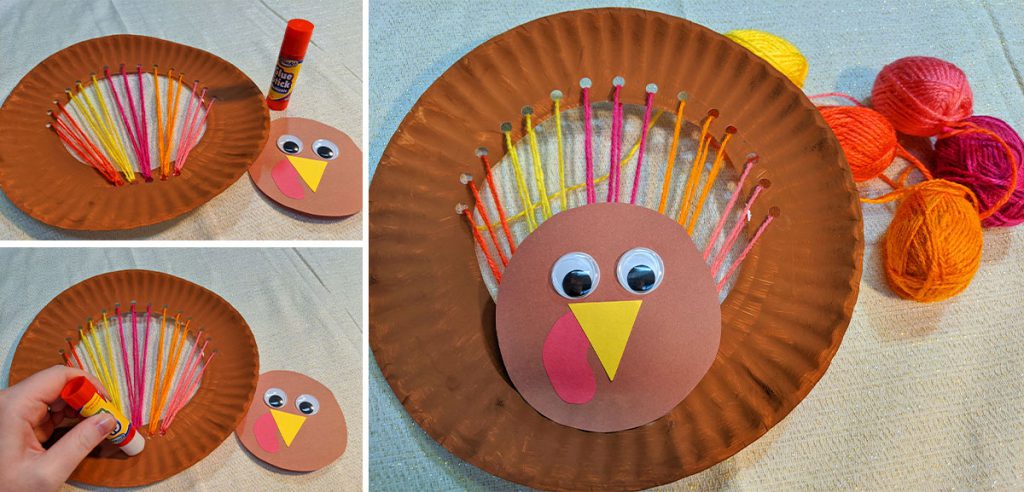
And Gobble, Gobble…you have a Thanksgiving turkey to decorate with (and it kept your kids occupied while you pulled out gizzards and got the green bean casserole going).
If you don’t already, follow unkrafty on Facebook, Pinterest, and Instagram!
This post may contain affiliate links.